A beautiful lawn is not something that you stumble upon without investing in the time and effort. The foundation of a healthy, thriving lawn is proper soil preparation. Whether you’re covering a few square feet in your backyard or several hundred for a larger landscaping project, understanding how to prepare soil for sod is crucial to getting your lawn looking its best. No homeowner or property owner wants patchy growth, air pockets, and a lawn that struggles to maintain its growth. In this comprehensive guide with the experts at Lavington Turf Farms, we’ll delve into why soil quality matters and provide you with step-by-step instructions detailing the ins and outs of how to prepare soil for sod installation.
Why Soil Quality Matters for Sod Success
Sod can do so much, from fixing patchy grass to creating lush tawns where there wasn’t any before.
When you think about laying newly installed sod, it’s easy to focus on simply the grass. The truth is that even the best sod can fail if the soil beneath is not properly readied.
A healthy, well-prepared soil will accomplish a few things.
First and foremost, it will provide adequate nutrients for root growth. Secondly, you will know with certainty that there is proper drainage to prevent waterlogging. Thirdly, it will confirm a stable base to prevent air pockets and uneven settling, and maintain a strong connection between the sod and the underlying soil.
Without addressing the soil first, you could run into trouble. Your sod may struggle to establish roots, dry out quickly, or develop uneven patches. This is why every property requires proper soil before laying sod.
Step 1: Measure and Plan Your Area
Before digging, be sure to take accurate measurements of the lawn area you plan to sod. Whether you’re working on a small area around a flower bed or larger facility grounds, you must know the exact square footage to order the right amount of sod.
For larger projects, consider creating a rough sketch of your lawn and marking any slopes, garden beds, or hardscapes.
Step 2: Remove Debris and Existing Vegetation
Next up on your to-do list will be to clear the area of rocks, sticks, weeds, and any existing grass.
This step is essential to ensure the new sod makes full contact with the soil. You can remove debris either by hand or with a rake. For stubborn grass or weeds, we recommend a sod cutter or garden hoe.
Do not leave behind old, existing growth. If you do, it will compete for the same nutrients and water as the sod. Ensure all existing debris and vegetation is stripped and carried out, giving your newly installed sod its best chance to root.
Step 3: Test the Soil
One of the most overlooked steps in soil preparation and one that is often skipped by property owners is testing the soil.
A soil sample from different parts of your yard can reveal pH levels, nutrient deficiencies, and provide information about the soil texture.
Try to collect samples from multiple spots and send them to a local service provide or garden center. Testing allows you to discover and correct imbalances before installing sod. There are many preventable imbalances that are simple enough to correct that will give your lawn its best chance at thriving. For example, lime can raise soil pH, sulfur can lower it, and starter fertilizer provides nutrients that help sod establish roots quickly.
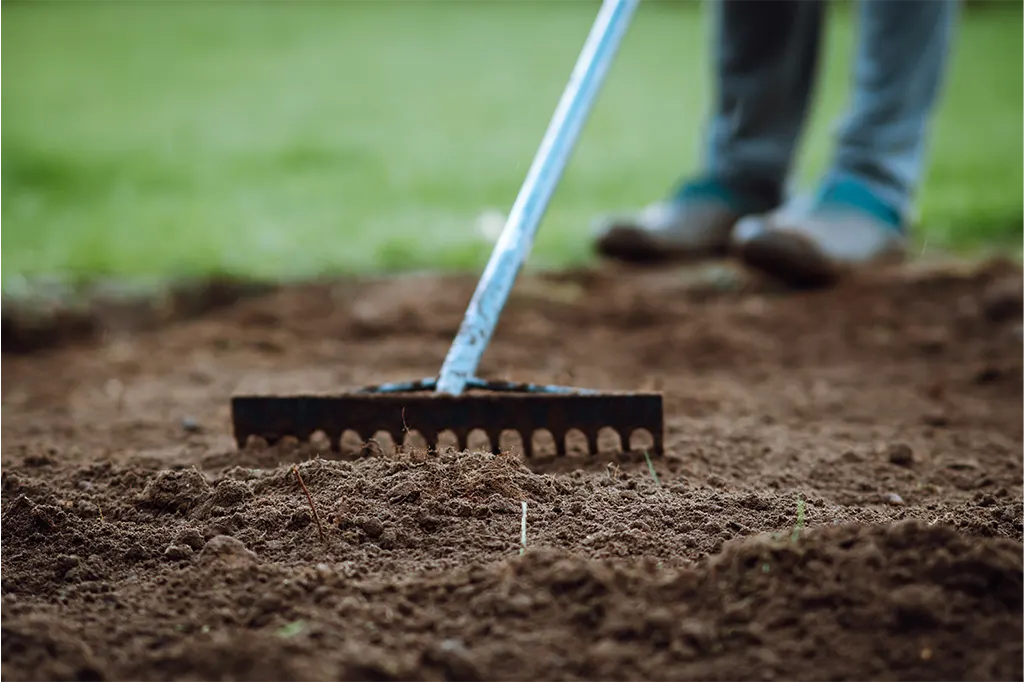
Step 4: Grade the Soil
After testing your soil, it’s time to grade it. Most go for a rough grade which is necessary to create drainage and prevent pooling water.
Start by using a rake, shovel, or grading tool to level the surface, aiming for a slight slope away from buildings. For larger areas, you may consider renting a roller or box scraper to get the job done. This is the easiest way to achieve a smooth, even surface.
Once your soil is graded, check the final grade to ensure everything is level. Search for any low spots and, if found, eliminate them. This will remove anything that could create air pockets under the sod.
Step 5: Improve Soil Quality
If you discover or know your soil to be heavy clay, sandy, or lacks organic matter, improve it before going further.
A few things you can try are to mix in compost, peat moss, or topsoil. These will enhance the structure, fertility, and water retention in the soil. That said, every soil is different, and how you might treat one type will be different from what’s best to approach another. For sandy soils, organic matter will help hold moisture, while clay soils benefit from aeration and the addition of organic material to prevent compaction.
At the end of this process, you will be left with soil for sod that is nutrient-rich and ready to support healthy root growth.
Step 6: Loosen and Level the Soil
Before laying sod, loosen the soil to a depth of 2-4 inches. This can be done with a garden fork, rototiller, or spade.
Why we loosen the soil is to allow roots to penetrate easily. It also improves water infiltration. After loosening, use a rake to level the area. A straight edge or leveling tool can help ensure a smooth surface. Proper leveling is especially important for large areas, where uneven soil can lead to an irregular lawn appearance.
Step 7: Apply Starter Fertilizer
A starter fertilizer provides essential nutrients that help sod roots establish quickly. For this reason, choose a fertilizer with a balanced mix of nitrogen, phosphorus, and potassium. Spread it evenly over the prepared soil, following package instructions for your square feet.
A starter fertilizer is particularly important for new lawns because it gives newly installed sod a nutrient boost that will promote rapid root growth and lush green colour.
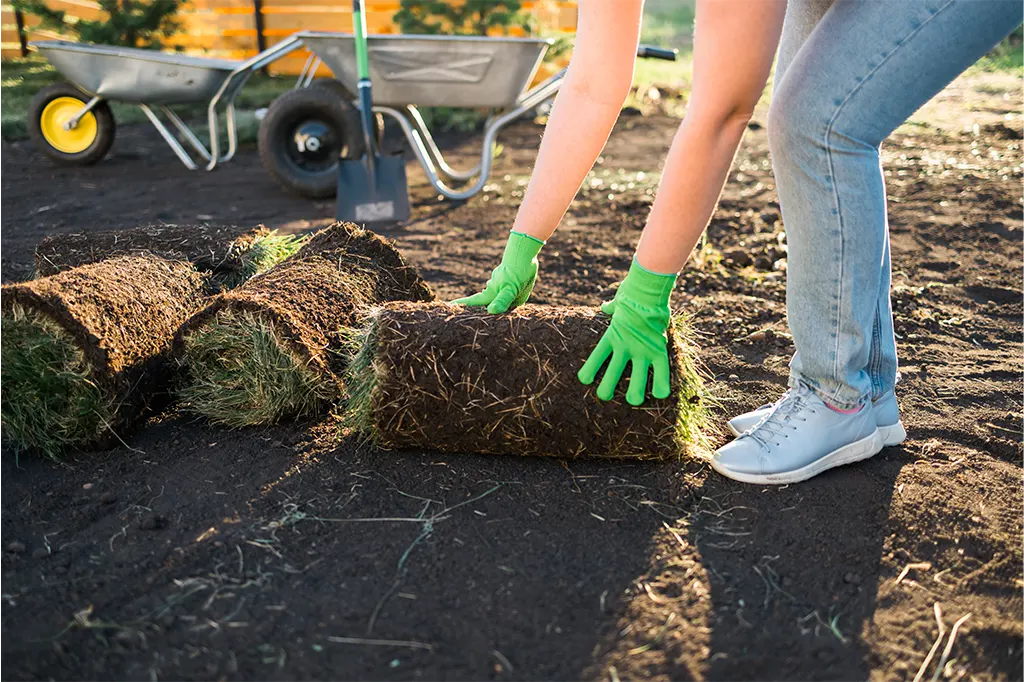
Step 8: Lay the Sod
With the soil ready, it’s finally time to lay down your locally sourced sod. To do this, start along a straight edge, such as a driveway or sidewalk. Lay the sod in a staggered brick-like pattern to avoid seams lining up, which can dry out faster. Press each piece firmly into the soil to eliminate air pockets. For small areas, manual placement is fairly straightforward. For large areas, it’s best to have a helper or professional service to make the process faster and more efficient.
Step 9: Water Properly
Immediately after sod installation, water the area thoroughly to moisten the soil beneath. Ensure you continue doing this for the foreseeable future. Consistent watering will be critical during the first two weeks to ensure roots establish. At the same time, avoid overwatering, which can lead to fungus and root rot.
As the sod roots begin to grow, gradually reduce watering frequency while increasing depth to encourage deep root growth.
Step 10: Maintain Your Lawn
After the sod has rooted, regular lawn maintenance will be essential to capitalizing on your hard work thus far.
Mow the lawn once the grass reaches 3-4 inches, keeping blades sharp and adjusting height gradually. Fertilize according to your soil type and local recommendations. Aerate periodically to prevent soil compaction, especially for large areas or high-traffic lawns.
Regular care will go a long way in ensuring your lawn stays beautiful, green, and healthy for years.
Our Best Tips for Success with Preparing Soil and Laying Sod
- Work quickly as sod dries out fast. Aim to lay it on the day it arrives. Minimize any delays.
- Avoid walking on fresh sod. Until roots are established, heavy traffic can damage the lawn. Advise any party who may be using the property to not walk over the sod during this period.
- Edge the area properly. Use a straight edge or edging tool to create clean borders and prevent sod from lifting.
- Monitor for pests and diseases as you carry out this process. Early detection of any lawn issue ensures a quick remedy and then healthy growth.
- Consider working on small areas first. If you’re new to sod installation, practicing on a smaller area can help build confidence before tackling large areas.
Knowing how to prepare soil for sod is the most important step in achieving a thriving, long-lasting lawn, which is always the goal of our team at Lavington Turf Farms. By testing the soil, removing debris, grading, improving soil quality, applying starter fertilizer, and carefully laying sod, you create the ideal environment for roots to grow strong.
It does not matter if you are working on a small area or covering hundreds of square feet. The same best practices apply across the board, and following these steps will help you ensure a beautiful lawn that will be the envy of your neighbourhood.
Believe us when we say that taking the time to properly prepare your soil saves time, money, and frustration in the long run. With the right preparation, your newly installed sod will quickly establish, providing a lush, green, and healthy lawn for years to come.
Are you ready to transform your lawn? Consider buying sod from the local experts in sod, used on residential homes, golf courses, and sports fields across the Okanagan. Contact Lavington Turf Farms today for premium sod, expert advice, and fast delivery straight to your yard.