Choosing Turf: How to Figure out What Type of Turf is Right for You
Choosing turf for your yard, sports field, or high-traffic area can feel overwhelming. You may be looking for a beautiful lawn for your home, a putting green, or simply a type of synthetic or natural turf that can withstand heavy use. Regardless, understanding the different types of turf products available to buy is essential. This guide will walk you through everything you need to know, from natural grass varieties to synthetic turf, helping you make the right choice for your property.
Understanding the Difference Between Natural and Synthetic Turf
The first step in choosing turf is deciding whether natural grass or artificial turf is the best fit.
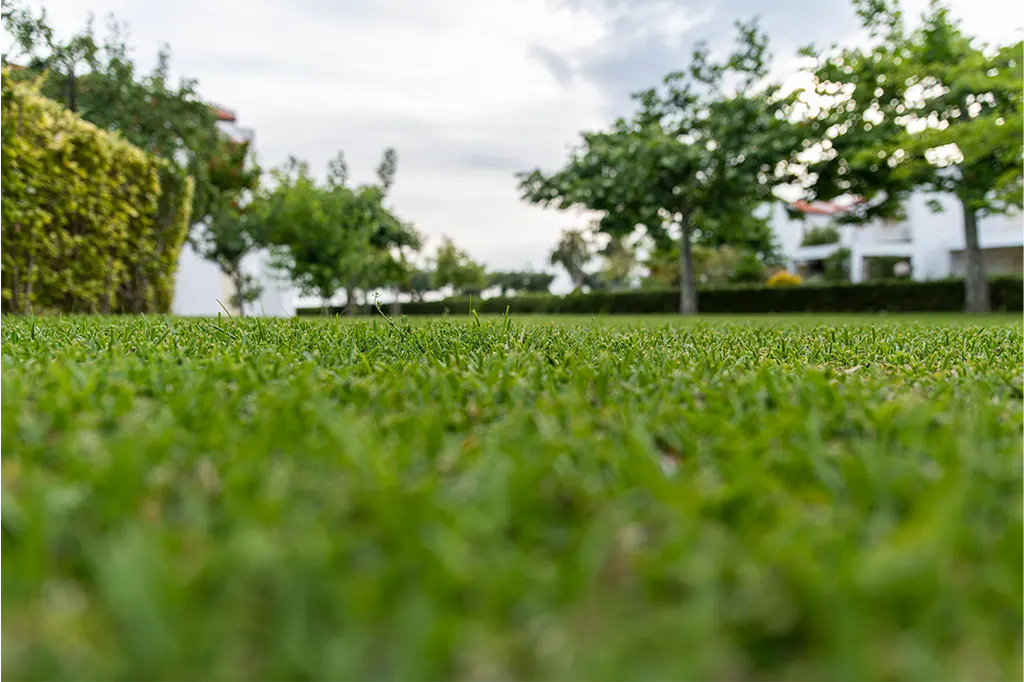
Most people do not think of natural grass when they hear the word ‘turf’ for the first time. Their mind automatically brings them to synthetic grass but it’s natural grass that is often a superior product. Natural grass is known for providing a lush, green lawn that feels soft underfoot and which supports local ecosystems. The most popular varieties include Kentucky bluegrass and cool season grasses. These and other types of natural grass turf are known to thrive in temperate climates and offer a classic, vibrant lawn look.
Comparatively, synthetic turf (or artificial turf) is a non-organic product engineered to mimic natural grass while requiring minimal maintenance. Some turf products come with antimicrobial properties, UV resistance, and customizable pile heights to suit a variety of applications. Despite its advantages, synthetic turf rarely matches the feel or aesthetics of natural grass. In addition, artificial turf is associated with negative environmental effects and, in some cases, can damage easily. If you choose synthetic turf, be careful. While once believed to be highly advantageous, it is rare to see synthetic preferred over natural grass turf.
Key Considerations When Choosing Turf
As you’re selecting between synthetic and natural turf, here are several factors to keep in mind before you make a decision.
1. Purpose and Usage
Consider how your turf area will be used. For a home lawn, your top priorities are likely to be how it looks, softness, and whether it carries a natural feel or not. For sports fields or play areas, durability, drainage, and resistance to wear are more critical considerations. To this later point, this is why organizations such as FIFA require premium matches, including the World Cup, to be played on natural grass turf instead of synthetic.
2. Climate and Temperature
The climate and temperature of your region are a collective factor no turf owner should ignore. Cool season grasses, like Kentucky bluegrass, thrive in temperate climates and are ideal for lawns that experience wider variations in temperature. For unpredictable seasons across Canada, this is the type of turf you want. For regions with hot summers or drought conditions, drought-tolerant grasses are also something to look for and a smart choice.
3. Maintenance Requirements
It’s important to remember that natural grass requires regular lawn maintenance, including mowing, watering, fertilization, and pest control to stay healthy. Homeowners who enjoy lawn care may appreciate the hands-on experience, but it’s important to assess whether you have the time and resources to maintain a beautiful lawn consistently. Some don’t. In their case, synthetic turf may be the way to go despite drawbacks.
4. Soil and Drainage
Should you choose to forego synthetics and opt for natural, good soil quality and drainage are a must for natural grass to thrive. Poor drainage can lead to waterlogged patches, disease, and uneven growth. This is something to monitor and consider as you want a turf that allows water and moisture to flow through and remain functional even in wet conditions.
Exploring Popular Grass Varieties
Many homeowners decide on natural grass turf but there are several types of natural grass to choose from. Knowing the differences between common grass varieties can help you choose the right grass for your lawn:
1. Kentucky Bluegrass
Renowned for its lush, dark green colour and fine texture, Kentucky bluegrass is a top choice for traditional residential lawns. This type of natural turf spreads quickly through underground rhizomes, creating a dense and uniform lawn that will recover well from wear.
2. Fescue Grass
Fescue grasses are another type of natural grass that many homeowners and property owners consider. It is versatile and drought-tolerant, making fescue suitable for areas known to experience variable weather, ranging from hot, dry conditions to overly wet or freezing cold climate. In terms of what you’ll discover in this category, fine fescues are softer and ideal for low-traffic lawns, while tall fescues handle higher foot traffic better.
3. Bermudagrass
Popular in warmer climates, Bermudagrass grows quickly and tolerates heat and heavy use. It’s an excellent option for sports fields and lawns that experience constant activity, though many homes may not necessarily require a grass quite this resilient. For any lawn area where there’s an expectation that it will experience significant use, seek out a strong natural turf choice as anything less could mean faded, damaged appearances over time.
4. Cool Season Grasses
Cool season grasses thrive in regions with mild summers and cold winters which admittedly is not always Canada. Cool season grasses grow actively in spring and fall, maintaining a vibrant green lawn during those periods while requiring some extra care in extreme heat. As long as a property owner is protective of cool season grasses during hot summer weeks, this variety is rather resilient and can last an extended length of time with no issues.

Understanding Synthetic Turf Options
If you’re considering artificial turf, it’s important to understand the features that differentiate this style of turf product as well.
1. Pile Height
The pile height of artificial turf refers to the length of the grass blades. Longer blades provide a more natural look and softer feel, while shorter blades offer easier maintenance and durability for high-traffic areas. In many cases, shorter blades sacrifice aesthetics in an uncomfortable way for some.
2. Density and Infill
Dense turf provides better cushioning as a person walks over artificial turf and supports heavier use, perfect for sports fields and areas where you know that community will gather. Infill materials, such as sand or rubber, are often used to add stability, improve drainage, and help artificial grass stand upright.
3. Antimicrobial Properties
While not a priority for every property owner, some may be searching for antimicrobial turf. Many modern artificial turf products include antimicrobial coatings to prevent bacteria, mold, and odors, making them ideal for play areas, pets, and sports fields.
4. UV and Weather Resistance
Synthetic turf is engineered to battle back against the damage that can come from sunlight, temperature extremes, and heavy rainfall. This means little-to-no fading or deterioration, though some low-quality synthetic turf may still degrade even if they are promoted as UV-resistant. Needless to say, this type of turf makes for a long-lasting pick for both residential and commercial applications.
Matching Turf to Your Space
Choosing turf is as much about aesthetics as it is about selecting a product that fits your environment and lifestyle.
Homeowners often want a beautiful, green lawn that they know will enhance curb appeal and that they’ll be able to enjoy outdoors. In that respect, Kentucky bluegrass or a drought-tolerant fescue blend offers a classic look with manageable maintenance.
Alternatively, there are high-traffic spaces like playgrounds, dog parks and trails, and outdoor entertainment that need turf where the goal is going to be a little different. The turf here must be able to withstand heavy wear. While it can be tempting to search for artificial turf manufactured with dense fibres, tough grass varieties like Bermudagrass or tall fescue perform even better in these conditions.
If we’re discussing something akin to a sports field, athletic areas require turf that is resilient, safe, and consistent. What you choose for turf for sports fields should maintain an even surface, resist damage from cleats, and offer excellent drainage.
Practical Tips for Choosing the Right Turf
- Assess Your Priorities – Consider whether your property is best suited with a turf that is low-maintenance, visually appealing, or durable.
- Test Soil and Light Conditions – Perform a soil test and examine what sun exposure the area has. Some grass varieties thrive in full sun, while others tolerate shade better.
- Evaluate Maintenance Commitment – Be realistic about how much time and effort you can dedicate to lawn care. Natural grass requires ongoing attention to keep it looking its absolute best.
- Consider Costs – Factor in water usage, fertilizers, mowing, and potential turf replacements over the long-term. Turf is an investment that any property owner will want to maintain or risk a degradation of appearance slowly over the seasons.
- Think About Climate – Choose grasses suited to your local climate. This ensures your lawn looks its best year-round.
Choose the Right Turf with Lavington Turf Farms As Your Guide
When it comes down to it, what you decide to use for turf will have to balance aesthetics, practicality, and long-term goals.
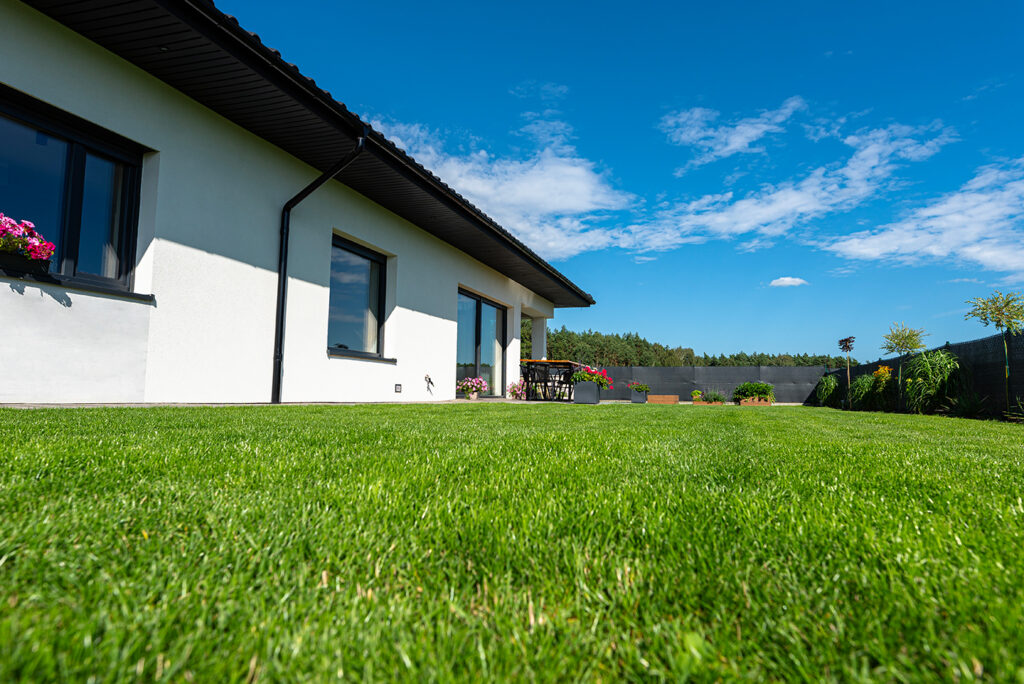
A natural lawn is our recommendation, due to its ability to offer unmatched beauty and a sensory experience that a synthetic turf cannot match. That said, it is not without care and attention. With the right maintenance, premium-quality natural turf outperforms synthetics on durability and flexibility. It is often your best choice for areas with a lot of foot traffic, such as sports fields. For any homeowner seeking a worry-free lawn, they can’t go wrong with quality-made natural grass.
Take the time to speak to an expert about grass varieties, what turf products may be best suited to your region, the impact of environmental conditions on turf, and how you should carry out maintenance. Make an informed decision and choose the turf that you know you will be able to enjoy for many, many years to come.Choosing turf doesn’t have to be complicated. Talk to one of our team members at Lavington Turf Farms to discover more about how to figure out what type of turf is best for your property. Contact us today.
How to Prepare Soil for Sod: Why Soil Quality Matters
A beautiful lawn is not something that you stumble upon without investing in the time and effort. The foundation of a healthy, thriving lawn is proper soil preparation. Whether you’re covering a few square feet in your backyard or several hundred for a larger landscaping project, understanding how to prepare soil for sod is crucial to getting your lawn looking its best. No homeowner or property owner wants patchy growth, air pockets, and a lawn that struggles to maintain its growth. In this comprehensive guide with the experts at Lavington Turf Farms, we’ll delve into why soil quality matters and provide you with step-by-step instructions detailing the ins and outs of how to prepare soil for sod installation.
Why Soil Quality Matters for Sod Success
Sod can do so much, from fixing patchy grass to creating lush tawns where there wasn’t any before.
When you think about laying newly installed sod, it’s easy to focus on simply the grass. The truth is that even the best sod can fail if the soil beneath is not properly readied.
A healthy, well-prepared soil will accomplish a few things.
First and foremost, it will provide adequate nutrients for root growth. Secondly, you will know with certainty that there is proper drainage to prevent waterlogging. Thirdly, it will confirm a stable base to prevent air pockets and uneven settling, and maintain a strong connection between the sod and the underlying soil.
Without addressing the soil first, you could run into trouble. Your sod may struggle to establish roots, dry out quickly, or develop uneven patches. This is why every property requires proper soil before laying sod.
Step 1: Measure and Plan Your Area
Before digging, be sure to take accurate measurements of the lawn area you plan to sod. Whether you’re working on a small area around a flower bed or larger facility grounds, you must know the exact square footage to order the right amount of sod.
For larger projects, consider creating a rough sketch of your lawn and marking any slopes, garden beds, or hardscapes.
Step 2: Remove Debris and Existing Vegetation
Next up on your to-do list will be to clear the area of rocks, sticks, weeds, and any existing grass.
This step is essential to ensure the new sod makes full contact with the soil. You can remove debris either by hand or with a rake. For stubborn grass or weeds, we recommend a sod cutter or garden hoe.
Do not leave behind old, existing growth. If you do, it will compete for the same nutrients and water as the sod. Ensure all existing debris and vegetation is stripped and carried out, giving your newly installed sod its best chance to root.
Step 3: Test the Soil
One of the most overlooked steps in soil preparation and one that is often skipped by property owners is testing the soil.
A soil sample from different parts of your yard can reveal pH levels, nutrient deficiencies, and provide information about the soil texture.
Try to collect samples from multiple spots and send them to a local service provide or garden center. Testing allows you to discover and correct imbalances before installing sod. There are many preventable imbalances that are simple enough to correct that will give your lawn its best chance at thriving. For example, lime can raise soil pH, sulfur can lower it, and starter fertilizer provides nutrients that help sod establish roots quickly.
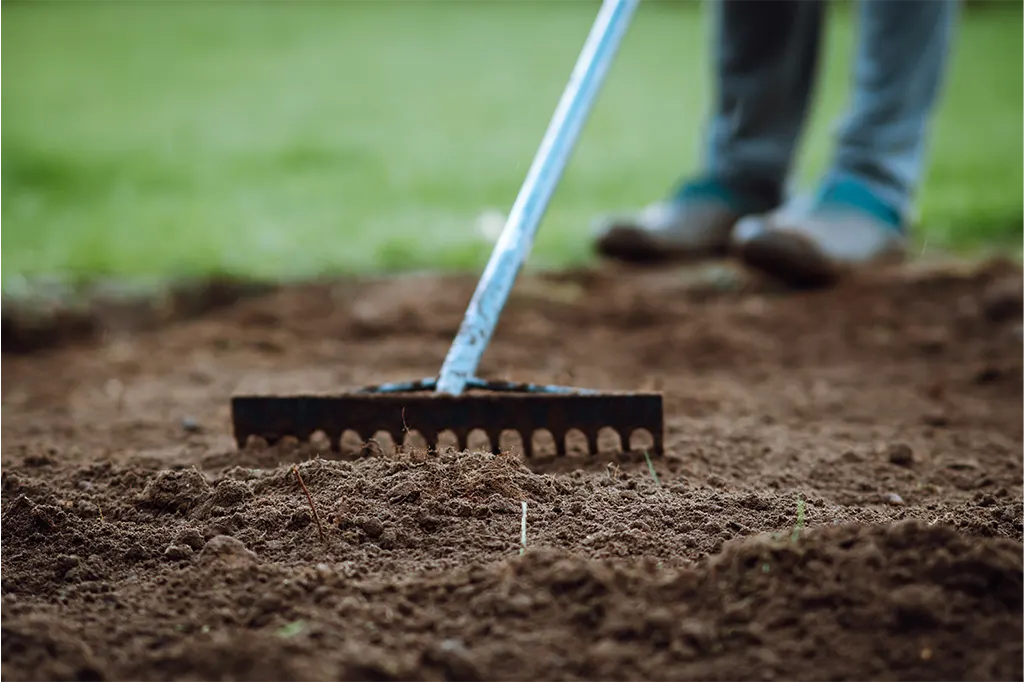
Step 4: Grade the Soil
After testing your soil, it’s time to grade it. Most go for a rough grade which is necessary to create drainage and prevent pooling water.
Start by using a rake, shovel, or grading tool to level the surface, aiming for a slight slope away from buildings. For larger areas, you may consider renting a roller or box scraper to get the job done. This is the easiest way to achieve a smooth, even surface.
Once your soil is graded, check the final grade to ensure everything is level. Search for any low spots and, if found, eliminate them. This will remove anything that could create air pockets under the sod.
Step 5: Improve Soil Quality
If you discover or know your soil to be heavy clay, sandy, or lacks organic matter, improve it before going further.
A few things you can try are to mix in compost, peat moss, or topsoil. These will enhance the structure, fertility, and water retention in the soil. That said, every soil is different, and how you might treat one type will be different from what’s best to approach another. For sandy soils, organic matter will help hold moisture, while clay soils benefit from aeration and the addition of organic material to prevent compaction.
At the end of this process, you will be left with soil for sod that is nutrient-rich and ready to support healthy root growth.
Step 6: Loosen and Level the Soil
Before laying sod, loosen the soil to a depth of 2-4 inches. This can be done with a garden fork, rototiller, or spade.
Why we loosen the soil is to allow roots to penetrate easily. It also improves water infiltration. After loosening, use a rake to level the area. A straight edge or leveling tool can help ensure a smooth surface. Proper leveling is especially important for large areas, where uneven soil can lead to an irregular lawn appearance.
Step 7: Apply Starter Fertilizer
A starter fertilizer provides essential nutrients that help sod roots establish quickly. For this reason, choose a fertilizer with a balanced mix of nitrogen, phosphorus, and potassium. Spread it evenly over the prepared soil, following package instructions for your square feet.
A starter fertilizer is particularly important for new lawns because it gives newly installed sod a nutrient boost that will promote rapid root growth and lush green colour.
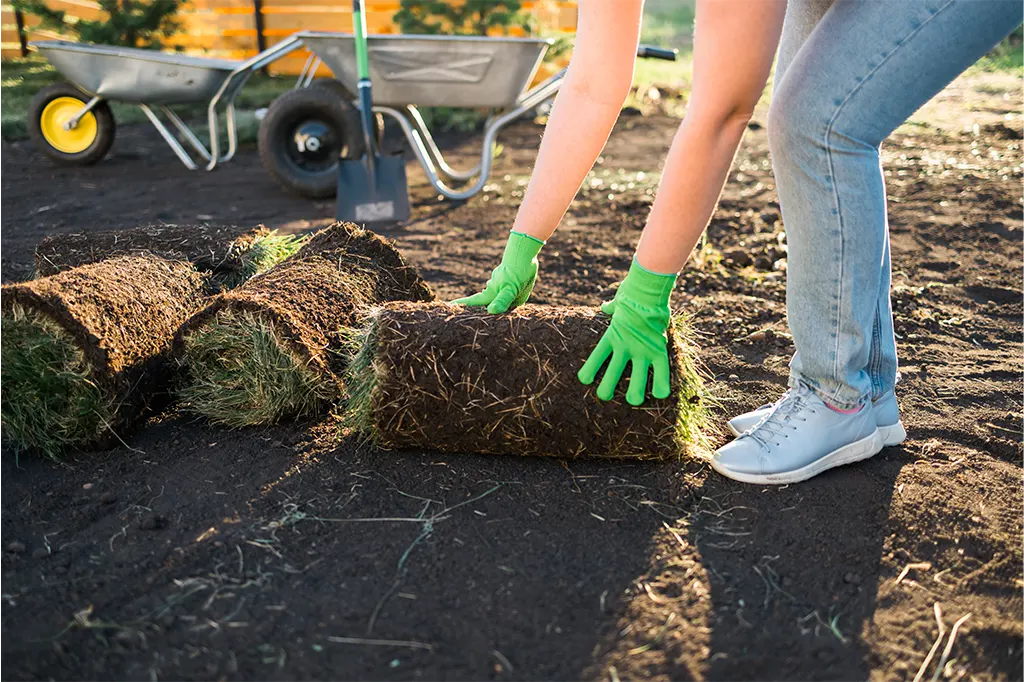
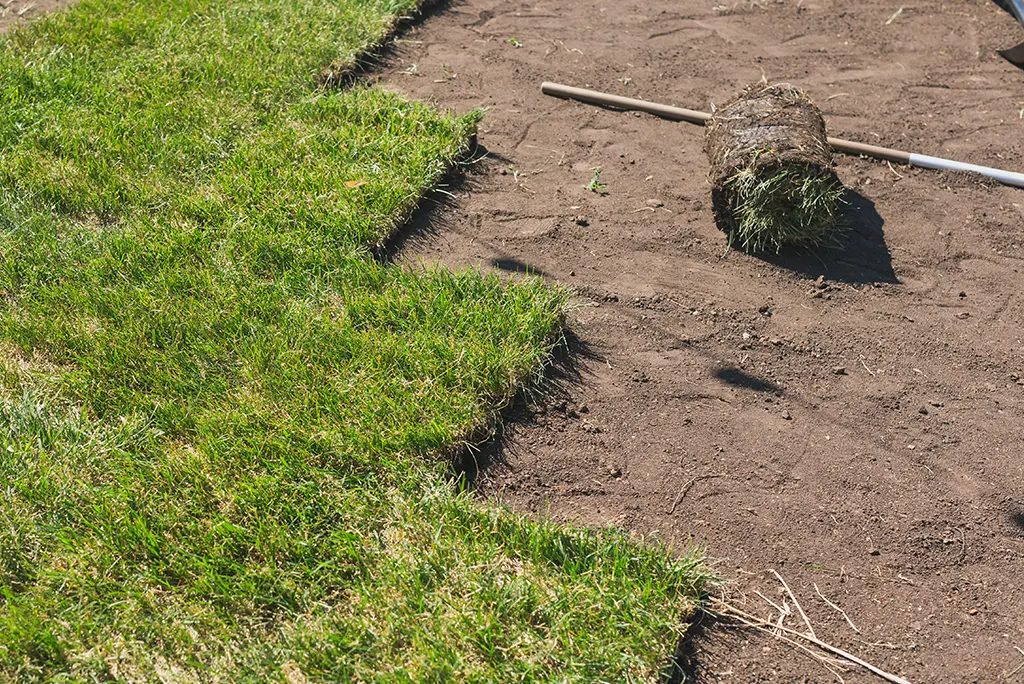
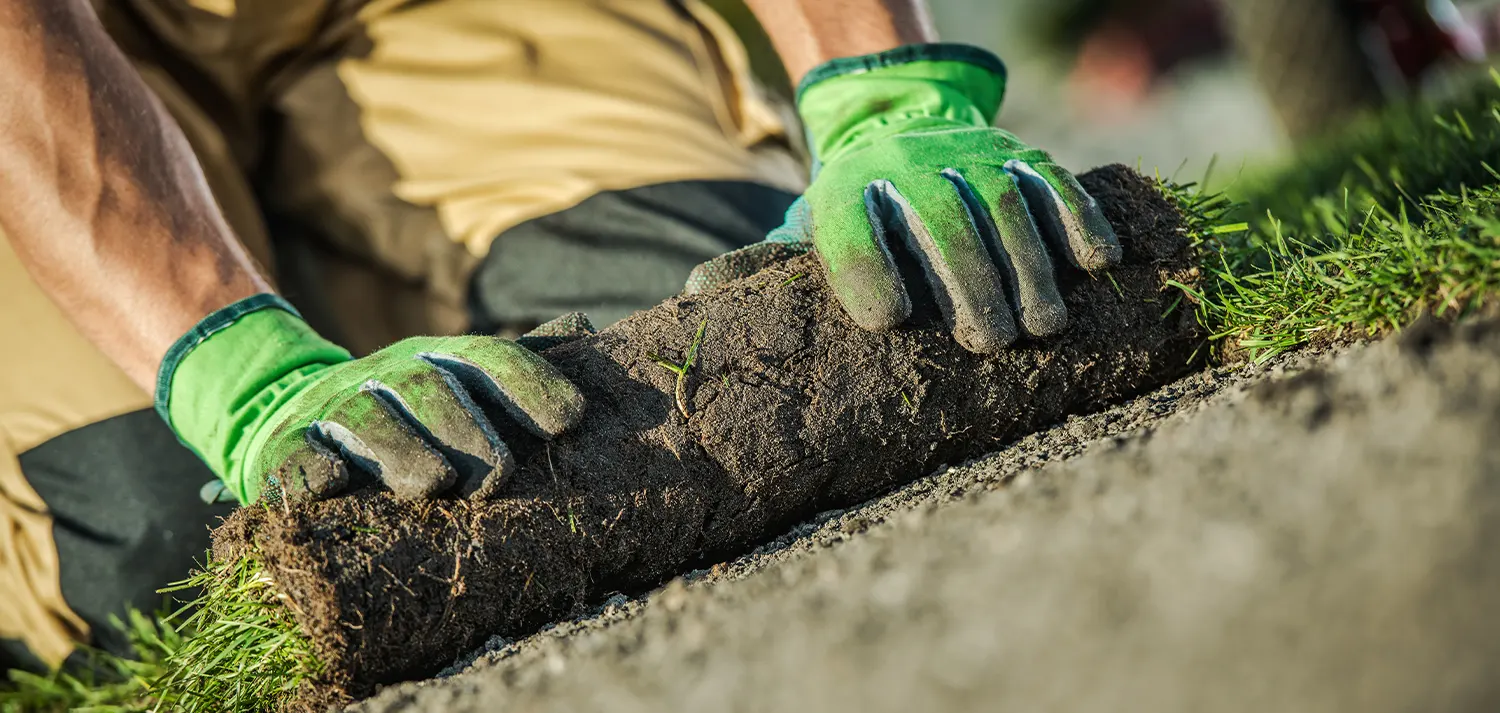
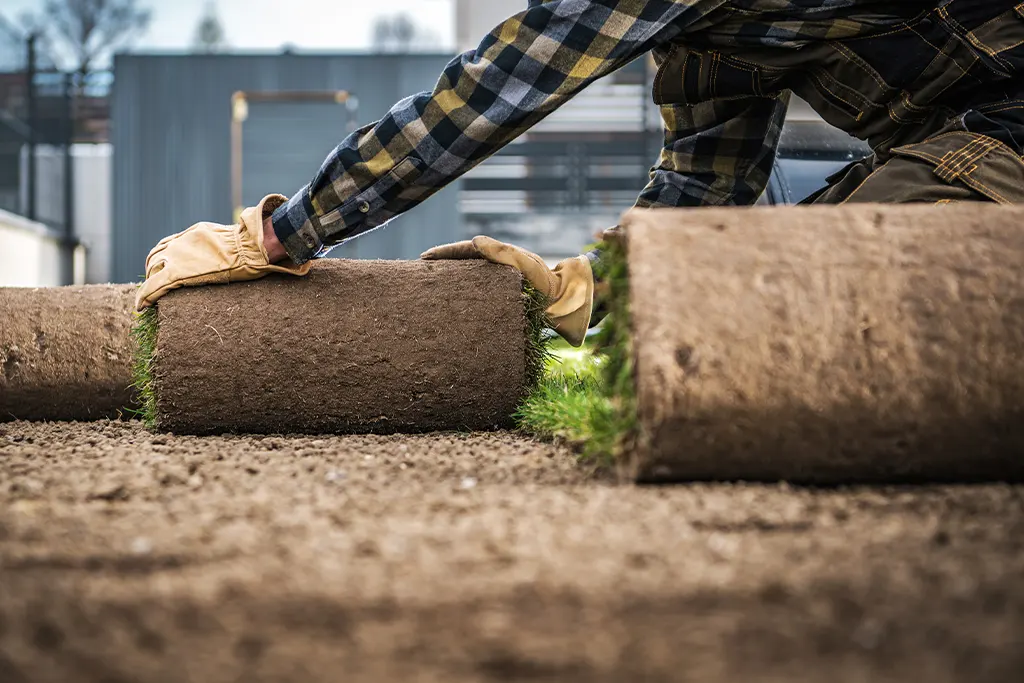
Step 8: Lay the Sod
With the soil ready, it’s finally time to lay down your locally sourced sod. To do this, start along a straight edge, such as a driveway or sidewalk. Lay the sod in a staggered brick-like pattern to avoid seams lining up, which can dry out faster. Press each piece firmly into the soil to eliminate air pockets. For small areas, manual placement is fairly straightforward. For large areas, it’s best to have a helper or professional service to make the process faster and more efficient.
Step 9: Water Properly
Immediately after sod installation, water the area thoroughly to moisten the soil beneath. Ensure you continue doing this for the foreseeable future. Consistent watering will be critical during the first two weeks to ensure roots establish. At the same time, avoid overwatering, which can lead to fungus and root rot.
As the sod roots begin to grow, gradually reduce watering frequency while increasing depth to encourage deep root growth.
Step 10: Maintain Your Lawn
After the sod has rooted, regular lawn maintenance will be essential to capitalizing on your hard work thus far.
Mow the lawn once the grass reaches 3-4 inches, keeping blades sharp and adjusting height gradually. Fertilize according to your soil type and local recommendations. Aerate periodically to prevent soil compaction, especially for large areas or high-traffic lawns.
Regular care will go a long way in ensuring your lawn stays beautiful, green, and healthy for years.
Our Best Tips for Success with Preparing Soil and Laying Sod
- Work quickly as sod dries out fast. Aim to lay it on the day it arrives. Minimize any delays.
- Avoid walking on fresh sod. Until roots are established, heavy traffic can damage the lawn. Advise any party who may be using the property to not walk over the sod during this period.
- Edge the area properly. Use a straight edge or edging tool to create clean borders and prevent sod from lifting.
- Monitor for pests and diseases as you carry out this process. Early detection of any lawn issue ensures a quick remedy and then healthy growth.
- Consider working on small areas first. If you’re new to sod installation, practicing on a smaller area can help build confidence before tackling large areas.
Knowing how to prepare soil for sod is the most important step in achieving a thriving, long-lasting lawn, which is always the goal of our team at Lavington Turf Farms. By testing the soil, removing debris, grading, improving soil quality, applying starter fertilizer, and carefully laying sod, you create the ideal environment for roots to grow strong.
It does not matter if you are working on a small area or covering hundreds of square feet. The same best practices apply across the board, and following these steps will help you ensure a beautiful lawn that will be the envy of your neighbourhood.
Believe us when we say that taking the time to properly prepare your soil saves time, money, and frustration in the long run. With the right preparation, your newly installed sod will quickly establish, providing a lush, green, and healthy lawn for years to come.
Are you ready to transform your lawn? Consider buying sod from the local experts in sod, used on residential homes, golf courses, and sports fields across the Okanagan. Contact Lavington Turf Farms today for premium sod, expert advice, and fast delivery straight to your yard.
How to Care for New Sod in the First 30 Days
Installing fresh sod is an exciting step toward achieving a lush, green lawn. However, proper care in the first month is crucial for ensuring strong root development and long-term health. If you’re wondering how to care for new sod, this guide will walk you through everything you need to know, from watering schedules to mowing tips. Let’s take a closer look at each step in detail.
Watering Your New Sod
Immediately After Installation
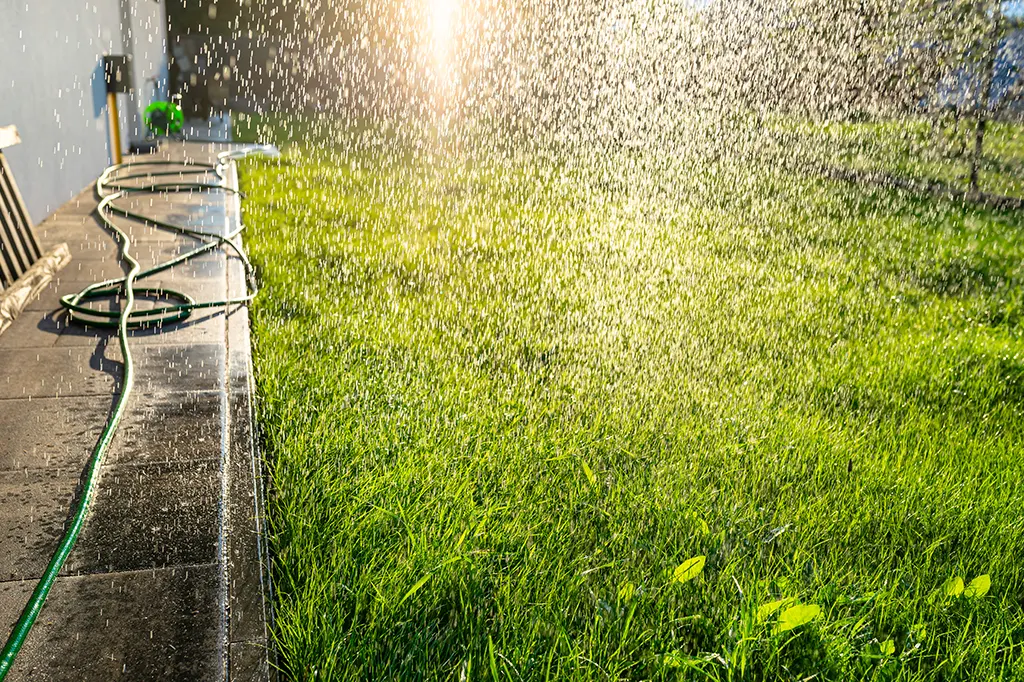
Water your new sod within 30 minutes of installation. You should thoroughly soak the soil underneath to help the grass blades settle and encourage root growth. A good soak ensures that the sod remains moist and starts bonding with the soil beneath it.
First 2-3 Weeks
For the first few weeks, water daily. Your new sod needs at least an inch of water per day, or more if the weather is hot or dry. Keeping the soil consistently moist is required for root establishment. If your area is experiencing high temperatures, consider watering twice a day to prevent the sod from drying out.
During this period, check moisture levels by lifting a corner of the sod. The soil underneath should be damp but not overly saturated. If it feels dry, increase watering frequency; if it’s muddy, scale back slightly.
After 2-3 Weeks
Once your sod begins to take root, gradually reduce watering frequency. Start watering every other day, then transition to every few days depending on the weather conditions. The goal is to encourage deeper root growth so your lawn becomes more drought-resistant.
This change is needed because watering too often after the first rooting phase can lead to shallow roots. This makes the grass rely on regular irrigation. Instead, longer and less frequent watering sessions encourage the roots to grow deeper into the soil, leading to a healthier, more resilient lawn.
Best Time to Water
Water in the early morning. This allows the grass blades to dry before night time, reducing the risk of fungal diseases. Morning watering also ensures that the sod gets enough moisture before the heat of the day sets in, preventing excessive evaporation.
Avoid Overwatering
Too much water can be just as harmful as too little. If you notice puddles forming, you may be overwatering. Overwatering can suffocate roots and lead to disease. Signs of overwatering include a spongy feel when walking on the grass or the presence of mould or fungus.
To check if your lawn needs water, use a screwdriver or soil probe. If it easily penetrates the soil up to six inches deep, your lawn has sufficient moisture. If it’s difficult to push in, it’s time to water.
Minimizing Foot Traffic
New sod is delicate. Try to stay off your freshly installed sod for at least two weeks to prevent compaction and root damage. Foot traffic can disrupt the rooting process and weaken the sod’s ability to establish itself properly. Even after a month, try to keep the foot traffic light to give the rooting system time to become stronger.
Mowing Your New Lawn
When to Mow
Wait at least two weeks before mowing. Ideally, the grass should reach about 3.5 to 4 inches before its first trim. Cutting it too soon can disturb the roots before they have properly anchored into the soil.
How to Mow
Use a mower with blades that are sharp to avoid tearing the grass. Dull blades can damage grass blades and cause stress, making your new sod more vulnerable to disease. Set your mower height to avoid cutting too much at once—removing more than one-third of the blade length can stress the new sod. Instead of mowing directly over the freshly laid sod, mow around the perimeter first to minimize stress on the grass.
For best results, mow when the grass is dry, as wet grass tends to clump and cause uneven cuts.
Fertilizing New Sod
Wait at Least 30 Days
Hold off on fertilizing for the first month. This allows the sod to establish itself without overstimulating growth. Fertilizing too soon can promote top growth instead of root development, leading to a weaker lawn in the long run.
Follow Application Instructions
Apply fertilizer according to the package instructions. Over-fertilizing can burn the grass and do more harm than good. Be sure to spread it evenly and avoid applying it right before rain to prevent runoff.
Monitoring Your New Sod
Check your lawn regularly for signs of over- or under-watering, disease, or stress. If you notice any sections that seem dry, adjust your watering schedule accordingly. Healthy sod should be firm, green, and well-rooted after the first month.
Ensure a Healthy Lawn
Taking the time to properly care for your new sod in the first 30 days ensures a healthy, long-lasting lawn. With consistent watering, minimal foot traffic, careful mowing, and proper fertilization, your sod will thrive and establish strong roots.
Investing effort early on will save you from future lawn issues and maintenance headaches. With the right lawn care routine, your new sod will reward you with a beautiful, lush yard for years to come.
Need help with your lawn care? Contact Lavington Turf Farms for expert advice and premium-quality sod.
Turf For Erosion Control: How Grass Can Help Save Your Soil
Soil erosion can be a problem for many property owners. If you live on a hill, near a riverbank, or in an area with heavy rain, you might notice soil loss over time. This can lead to unstable ground, poor plant growth, and potential damage to your landscape.One simple way to manage erosion is by installing turf. Grass holds soil in place, slows water flow, and helps prevent further damage. This guide explains why erosion happens, how turf helps, and how to install it properly.
Why Erosion Is a Problem
Soil erosion happens when wind, water, or foot traffic wear away the topsoil. The top layer of soil contains the nutrients plants need to grow. Once it’s gone, it becomes harder to support healthy vegetation.
Common causes of erosion include:
- Steep slopes where rainwater washes soil away quickly.
- Heavy foot traffic that damages grass and exposes soil.
- Frequent rain or strong winds that displace loose dirt.
- Land clearing and construction that remove protective vegetation.
How Turf Helps Prevent Erosion
Turf is a natural way to prevent erosion. Grass helps keep soil in place by growing deep roots that hold the soil together and prevent it from washing away. The grass itself also acts as a barrier, reducing the impact of rain and slowing down the movement of water across the ground.
Turf is especially effective in areas where you need quick coverage, like slopes or drainage zones.
Choosing the Right Grass for Erosion Control.
Different grass types do better in different conditions. Consider these factors when selecting grass for erosion control:
- Climate: Some grasses thrive in cool climates, while others prefer heat. Kentucky Bluegrass does well in drought and cold climates because of its durability. Bermuda grass suits warm climates and resists drought.
- Soil type: Grass varieties grow best in different soils. Ryegrass does well in sandy soil, while fescue handles clay-heavy areas.
- Land slope: Steep slopes need grass with strong root systems. Fescue, ryegrass, and Bermuda grass work well on inclines.
- Water availability: If your property gets little rainfall, choose drought-resistant options like Bermuda or Kentucky Bluegrass.
Installing Turf for Erosion Control
Once you choose the right grass, you can install turf using sod or seeds. Each method has benefits.
Step 1: Prepare the Site
- Remove weeds, rocks, and debris.
- Loosen compacted soil with a rake or garden fork.
- Add compost or organic material to improve soil health.
Step 2: Install the Turf
- Laying sod: Place sod pieces like bricks, ensuring no gaps between them. Press down lightly and water immediately.
- Planting seeds: Spread seeds evenly over the soil. Lightly rake the area to ensure contact with the soil. Cover with a thin layer of mulch to retain moisture and protect seeds from erosion.
Step 3: Water and Maintain
- Keep the soil moist until the grass establishes roots.
- Gradually reduce watering as the grass grows stronger.
Step 4: Use Mulch or Erosion Control Mats (If Needed)
In high-risk areas, such as steep slopes, mulch or erosion control products help keep soil in place. Turf reinforcement mats (TRMs) add long-term stability, especially in spots with high flow runoff. These mats slowly break down over time, allowing grass to take root and hold the soil together.
Ongoing Care and Maintenance
To keep your turf in ideal condition, check for weak spots that might need reseeding or additional sod. Fertilize the grass a couple of times a year to encourage healthy growth and aerate the soil annually to help roots penetrate deeply.
With regular care, your turf will continue to protect your land from erosion for years.
Protecting Your Land with Turf
Turf is one of the most effective and natural ways to prevent soil erosion. Choosing the right grass and properly installing it protects your land from erosion and keeps your landscape lush and green.
Contact Lavington Turf Farms for high-quality turf solutions and expert advice to help protect your land from erosion.
Mastering Lawn Maintenance: How to Get a Green Lawn

Keeping your lawn healthy and green in the Okanagan can be tricky with our hot summers and dry conditions, but with the right care, you can have a lush and green lawn year-round. Let’s break down the key things you need to know about lawn care, from watering to mowing, fertilizing, and dealing with drought.
1. Understand Your Lawn’s Needs
Soil Testing
Before you start treating your lawn, it’s a good idea to know what’s going on with your soil. Testing your soil’s pH and nutrients helps you understand what your lawn needs. A simple soil test kit can help you figure out if your soil is too acidic or too alkaline, and whether you need to add anything to make it healthier.
Choosing the Right Grass
In the Okanagan, it’s best to go with a grass that can handle the heat and occasional drought. Kentucky bluegrass is a popular choice because it does well in our climate and bounces back quickly after dry spells. The right grass makes all the difference in how easy it is to care for your lawn.
2. Watering Tips
Water Deeply, Not Often
Your lawn needs about 1 inch of water per week, and it’s best to water it 2-3 times a week, not daily. Deep watering encourages the grass to develop strong roots that reach down for water, making your lawn more drought-resistant in the long run. Watering daily can make the grass roots stay close to the surface, which makes your lawn weaker.
The key is to water deeply enough that the soil around the root zone is moistened, but you don’t want to drown your grass either. Watering too often, or in shallow amounts, can create a shallow root system, leaving your lawn vulnerable when water is scarce.
Watering Time Matters
It’s best to water early in the morning when temperatures are cooler. This helps the water soak into the ground before the sun evaporates it. Try using soaker hoses or drip irrigation for even moisture distribution.
3. Mowing Like a Pro
Cut at the Right Height
Mowing can be tricky. Cutting your grass too short stresses it out and makes it easier for weeds to take over. Keep your grass around 2.5 to 4 inches tall. And when you mow, never remove more than a third of the grass height at once. This keeps your lawn healthy and lush.
Sharp Lawn Mower Blades
A sharp mower blade is key to a healthy, green lawn. Dull blades tear the grass rather than cutting it cleanly, leaving jagged edges that quickly turn brown. If you notice the tips of your grass looking white or frayed, it’s a sign your blades need sharpening. You should try to sharpen your mower blades once or twice a year, or replace them if they’re too worn down. A clean cut helps the grass heal faster and stay healthy, giving your lawn that lush, vibrant look.
4. Fertilizing for a Healthier Lawn
Fertilize Seasonally
Your lawn loses nutrients over time, so feeding it with fertilizer is a must. Fertilize at least 3 times a year—once in the spring, once in the summer, and once in the fall. This gives your grass the nutrients it needs to grow thick and strong.
Choosing Fertilizer
Pick the right fertilizer for your lawn’s needs. If you’re not sure what to use, talk to local experts or check with local suppliers for advice. They’ll help you find the best product for your grass type and soil.
5. Dealing with Weeds and Pests
Prevent Weeds Naturally
A healthy lawn naturally fights off weeds. The key is to keep it strong by watering, mowing, and fertilizing regularly. If your grass is thick and healthy, weeds won’t stand a chance.
Targeted Treatments
If you spot weeds, take care of them right away. You can either pull them by hand or use a targeted herbicide. But always be careful with chemicals—read the labels and follow the instructions so you don’t harm your lawn.
6. Managing Drought Conditions
Know When Your Lawn Is Dormant
During dry spells, your lawn might turn brown, but don’t panic—it’s just going into dormancy. Grass in dormancy is still alive, and it’ll bounce back when the weather improves or when you start watering again.
Water Less During Drought
In drought conditions, you don’t need to water your lawn as much. Watering every two to four weeks with about 1/4 inch of water is usually enough to keep the roots alive without encouraging too much grass growth. Your lawn will survive, and once the weather cools, it will green up again.
7. Sustainable Lawn Care
Be Water-Wise
Water conservation is a big deal in the Okanagan, especially during droughts. Lavington Turf Farms is part of the North Okanagan Regional District’s Drought Response Team and helps create plans for water conservation. We also believe in teaching our community how to take care of their lawns while saving water.
Shop Local and Sustainable
For the best products, shop with local suppliers who focus on sustainable lawn care. By choosing products that are environmentally friendly, you can help keep your lawn green and reduce your environmental footprint.
Take Care of Your Lawn
Taking care of your lawn in the Okanagan doesn’t have to be hard. By following these simple tips on watering, mowing, fertilizing, and managing drought conditions, you can have a healthy, green lawn without wasting water.
If you need help choosing the right grass or advice on lawn care, don’t hesitate to contact Lavington Turf Farms. We’re here to help you create the best lawn in the neighbourhood!
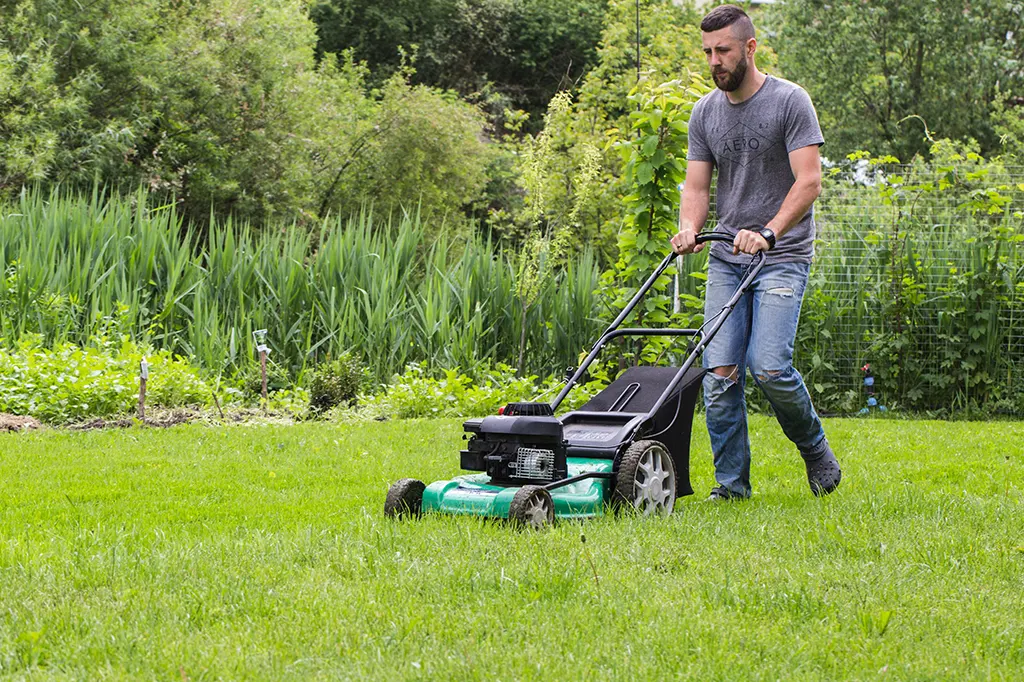
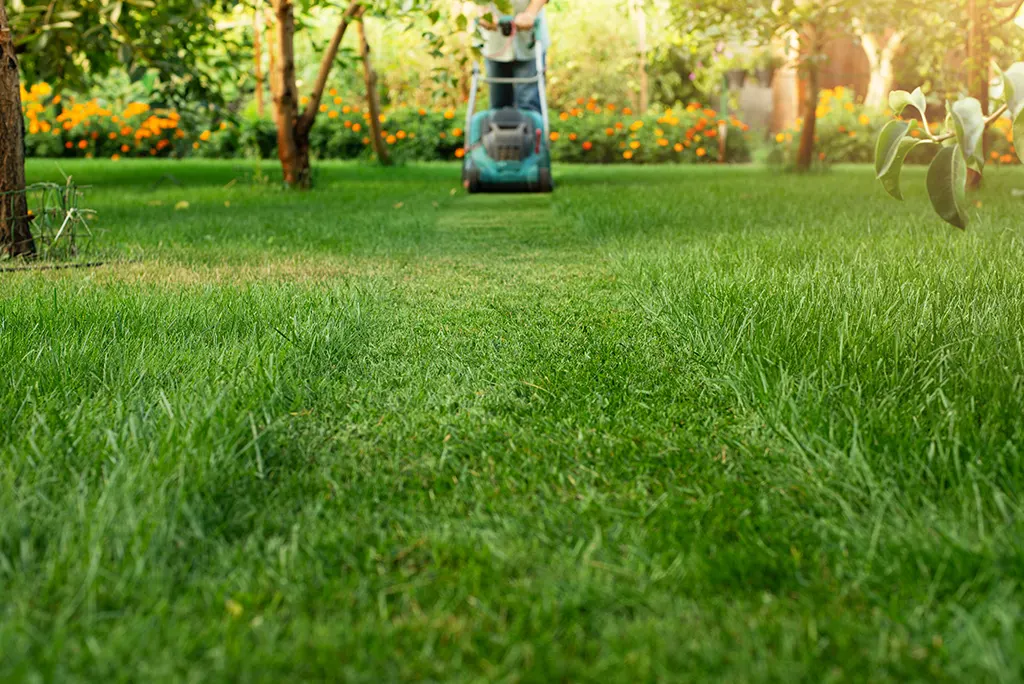
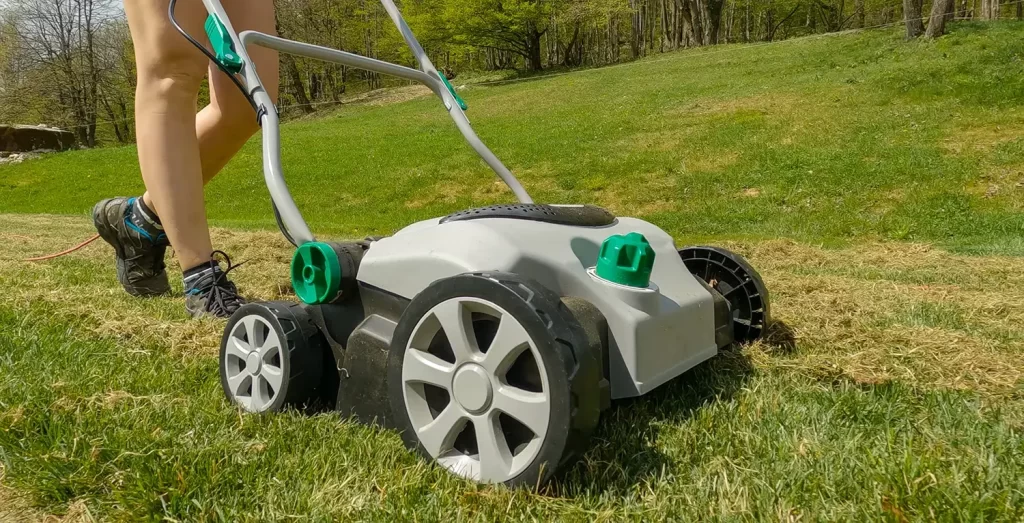
How to Mow a Lawn Like a Pro: Best Practices for Healthy Turf
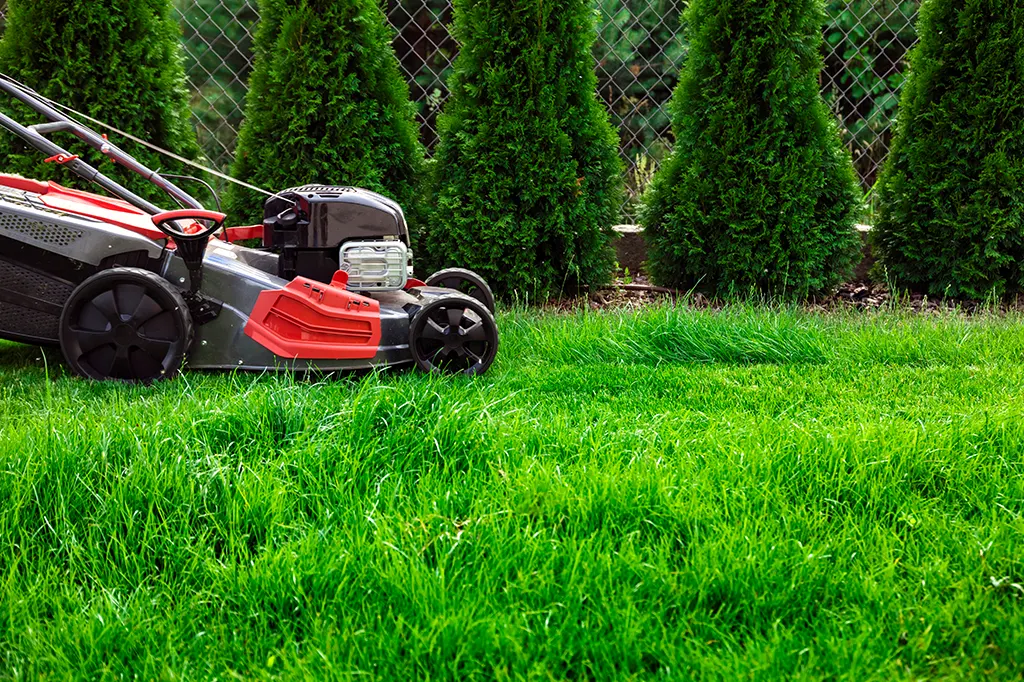
Mowing the lawn might seem straightforward, but there’s more to it than just pushing a mower around. If you want to achieve a healthy, lush lawn, following best practices can make all the difference. These seven steps will help you mow like a pro and keep your yard looking its best year round.
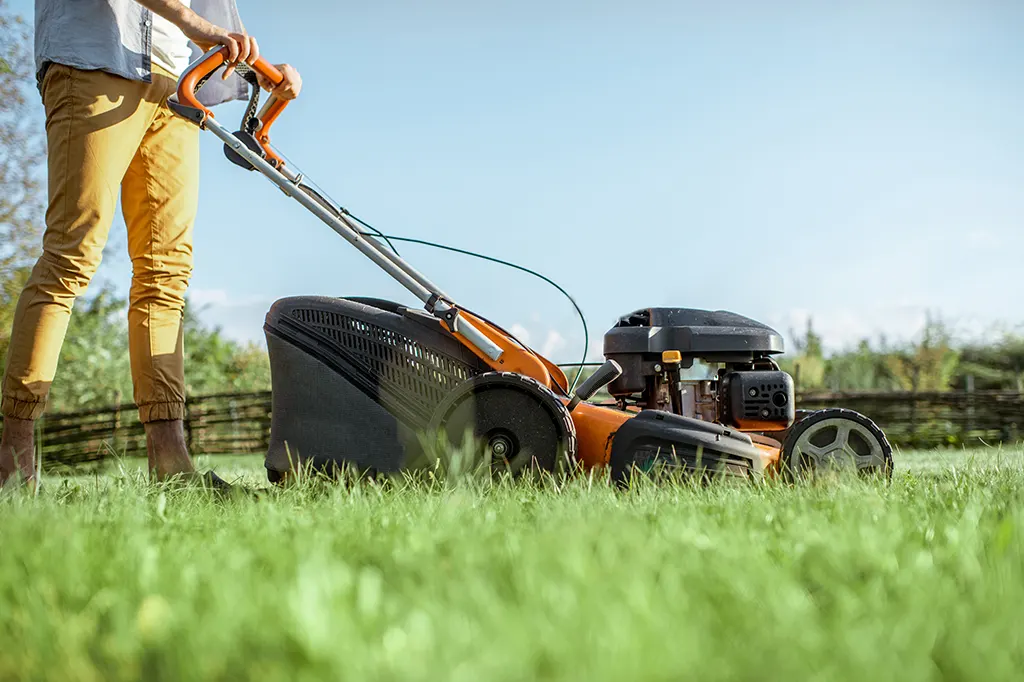
1. Choose the Right Mower for Your Lawn
The first step in mowing your lawn is choosing the right mower. Not all mowers are suitable for every lawn, and selecting the right one will make the job easier and more effective. If you have a small, flat lawn, a push mower may be sufficient. They are affordable, require little maintenance, and give you a bit of exercise. For larger lawns or uneven terrain, a self-propelled or riding mower is a better option. These mowers take the strain off when navigating hills or covering large areas.
When choosing between gas, electric, or battery-powered mowers, consider what works best for you. Gas mowers offer power and longer run times, but they need more maintenance. Electric mowers are quieter and more eco-friendly, while battery-powered mowers are convenient and cordless, though they tend to be heavier. Choose a mower that fits the size and type of your lawn for the best results.
2. Keep Your Mower Blades Sharp
Dull mower blades can do more harm than good. A dull blade tears grass rather than cutting it cleanly, which stresses the grass and makes it more susceptible to disease. To avoid this, ensure your mower blades are sharp. Sharp blades cut grass cleanly, promoting healthier growth.
You should sharpen your mower blades every 20–25 hours of use, or at least twice during the mowing season. If you notice the grass edges are ragged or not cutting properly, it’s time to sharpen the blades. You can sharpen them yourself if you have the right tools, or you can have them professionally sharpened for precision.
3. Set the Right Mowing Height
Mowing at the right height is essential for a healthy lawn. Different grass types thrive at different heights, and mowing too short can damage your grass. A good rule of thumb is the “one-third rule” — never cut more than one-third of the grass height in a single mow. This helps maintain the health of your grass and encourages root growth.
For cool-season grasses like Kentucky bluegrass or fescue, keep the grass height between 2.5” and 4”. For warm-season grasses like Bermuda or Zoysia, aim for a height between 1” and 2.5”. Adjust the mower’s height according to the season. During the hot summer months, it’s best to mow the grass a bit higher to avoid stressing it. In cooler months, you can lower the height for better root development.
4. Follow the Right Mowing Frequency
How often should you mow your lawn? The answer depends on how fast your grass is growing. During spring and summer, aim to mow weekly, or more frequently if the grass is growing fast. In fall, mowing every 10–14 days is usually sufficient as the grass slows down. Winter mowing is rare unless you have warm-season grass that continues to grow during the colder months. In that case, mow once every few weeks. Instead of just sticking to a schedule, keep an eye on your grass growth. If the grass
Keep an eye on your grass growth rather than just sticking to a schedule. If the grass isn’t growing quickly, you can go longer between mowings without negatively impacting the health of your lawn.
5. Vary Your Mowing Pattern
Mowing in the same direction every time can lead to uneven growth, with the grass starting to lean in the direction you mow most frequently. To prevent this and encourage even growth, try varying your mowing pattern. Change from horizontal to vertical, or even mow diagonally.
Alternating between different mowing patterns also helps reduce soil compaction, which can hinder healthy root growth. By changing your mowing direction each time, you’ll keep the grass growing upright and help your lawn thrive. So, mix it up to keep your lawn looking fresh and promote better growth.
6. Leave the Clippings (Grasscycling)
One common misconception is that grass clippings should always be bagged. However, leaving clippings on your lawn can be beneficial for the grass. Grass clippings are a natural fertilizer, returning valuable nutrients like nitrogen, phosphorus, and potassium to the soil. This process is called grasscycling.
If you mow your lawn regularly, you don’t need to bag the clippings. They will break down quickly and won’t cause thatch buildup. However, if the grass is too long or the clippings are too large, it’s a good idea to bag them to prevent clumping. Use a mulching mower to chop the clippings into fine pieces, allowing them to decompose quickly and nourish your lawn.
7. Edge & Trim for a Professional Finish
To give your lawn that professional, manicured look, try edging and trimming the lawn. Clean, defined edges along driveways, sidewalks, and garden beds create a sharp boundary that enhances the appearance of your lawn.
Use a string trimmer or rotary edger to tidy up the edges and ensure a neat finish. Edging doesn’t take long, but it makes a significant difference in the overall look of your lawn. Aim to edge every 2–3 mowings to maintain those crisp lines. A little extra effort here goes a long way in boosting your lawn’s curb appeal.
Enjoy a Healthy Lawn
Mowing your lawn like a pro is all about following the right techniques and paying attention to the details. By choosing the right mower, keeping your blades sharp, mowing at the correct height, varying your mowing pattern, and grasscycling, you’ll have a healthy, beautiful lawn. Don’t forget to edge and trim for that finishing touch that gives your lawn that professionally manicured appearance.
At Lavington Turf Farms, we provide high-quality, drought-tolerant sod and expert advice to help enhance the health and beauty of your lawn. Contact us today!
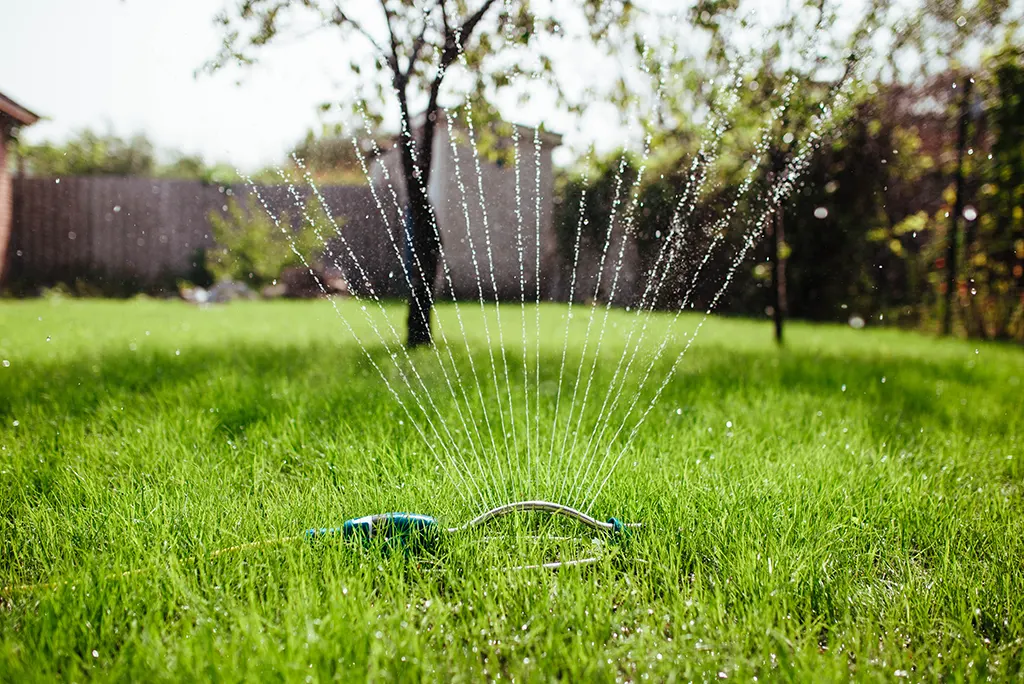
Mastering Lawn Watering: Tips for a Healthy, Lush Lawn
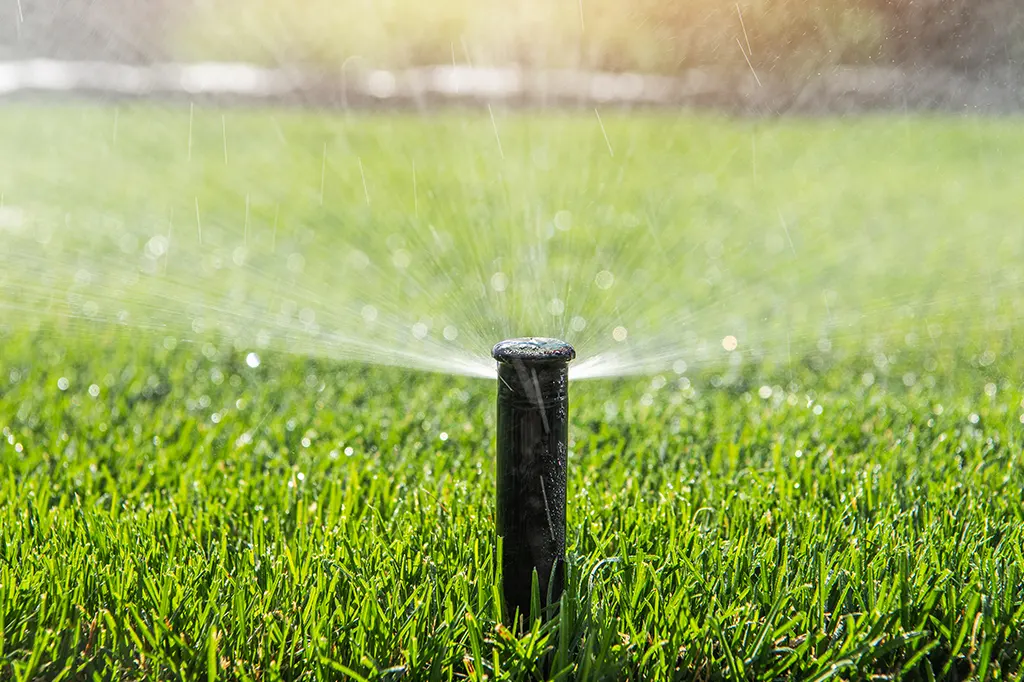
A healthy lawn doesn’t just happen by magic—it’s all about the right care, and proper watering is a huge part of the equation. If you’ve been wondering how to give your grass the hydration it needs without overdoing it, you’re in the right place. Let’s examine the best tips for watering grass effectively, sustainably, and without wasting a drop.
Understanding Your Lawn’s Water Needs
Every lawn varies, and understanding its specific needs is the first step to success. Grass type, soil type, and local climate all play a big role in how much and how often you should water. For example, sandy soil drains faster and loses water quickly, while clay soil holds onto moisture longer. Knowing your soil type can help you determine how to maintain proper soil moisture.
Your lawn’s grassroots also influence watering needs. Shallow roots can lead to a lawn that dries out quickly, while deeper roots mean your grass can tap into moisture deeper in the soil. Encouraging deep roots is key to creating a resilient lawn that requires less watering.
Best Times to Water Your Lawn
Timing is everything when it comes to watering grass. Early morning is the best time to water because the cooler temperatures allow the water to soak into the soil before the sun evaporates it. Watering in the evening might seem convenient, but it can leave your grass wet overnight, increasing the risk of fungus or other issues. A water timer can help you stay consistent and ensure your lawn gets the hydration it needs at the right time.
How Much Water Is Enough?
As a general rule, lawns need about 1 to 1.5 inches of water per week, including rainfall. This amount encourages grass roots to grow deeper, which helps your lawn stay lush and green even during dry spells. To measure, place a rain gauge or empty tuna can under your sprinkler system. Adjust your watering schedule based on rainfall and your lawn’s specific needs.
It’s better to water deeply and less frequently than to water lightly every day. Deep watering helps soil moisture reach deeper roots, while frequent, shallow watering encourages shallow roots—and that’s not what you want for a healthy lawn.
Watering Shady vs. Sunny Areas
Different parts of your lawn have different needs. Sunny areas dry out faster and need more frequent watering to maintain soil moisture. These areas benefit from deep watering sessions to encourage grassroots to grow deeper and access more water.
Shady areas, on the other hand, retain moisture longer. Overwatering these spots can lead to problems like fungus or root rot. For lawns with a mix of sun and shade, consider using a water timer and adjusting the settings for your sprinkler system to give each area the right amount of water.
Choosing the Right Tools and Systems
The tools you use make all the difference. A good sprinkler system is a great option for watering, but don’t overlook upgrades like smart irrigation systems. These systems optimize watering schedules by considering weather and soil moisture, helping conserve water while maintaining your lawn’s ideal condition.
Drip irrigation systems are another option, especially for gardens or areas with flower beds, as they target the soil directly without wasting water. Adding a water timer to your setup ensures your lawn gets what it needs without requiring you to stand around with a hose.
Water Conservation Tips
Conserving water doesn’t just save on your utility bill—it’s also good for the environment. If you’re in an area with water restrictions, you’ll need to get creative to maintain a healthy lawn. Choosing drought-tolerant grass seed is a great start. These grasses are better at growing deeper roots, which helps them thrive even with less water.
Another tip is to mulch your grass clippings. This not only helps retain soil moisture but also adds nutrients back into the soil. Harvesting rainwater with barrels or other systems can provide an eco-friendly water source for your lawn, too.
Troubleshooting Common Problems
Dry spots, pooling water, and uneven growth are all signs that your watering routine needs a tweak. Dry patches often mean some areas aren’t getting enough water. Adjust your sprinkler system to cover those spots evenly. Pooling water can indicate overwatering or compacted soil that prevents absorption—aerating the soil can help.
If your lawn slopes, water may run off before it has a chance to soak in. To solve this, water in shorter cycles, giving the soil time to absorb the water before adding more. This technique, often called cycle-soak watering, can make a big difference in uneven areas.
Maintaining a Healthy Lawn
Consistency is the secret to success. Stick to a schedule, monitor your soil moisture, and don’t hesitate to make adjustments as needed. A healthy lawn with deep roots isn’t just about watering—it’s also about choosing the right grass seed, maintaining your irrigation system, and paying attention to signs your lawn gives you.
By watering your lawn thoughtfully and using tools like a sprinkler system or water timer, you can enjoy a lush lawn while conserving water and staying within local restrictions. With a little effort, you’ll have a yard you’re proud of all season long.
For personalized advice or assistance with your lawn care needs, feel free to contact us today!
How to Lay Turf on a Slope: A Step-by-Step Guide for Beginners
With the right steps, the daunting task of laying turf on a slop becomes much less intimidating. This guide will take you through each step to ensure that you end up with a lush and stable lawn that will last for years to come.
Step 1: Assess the Slope and Plan
Start by understanding what you’re working with:
- Measure the Gradient: Use a level or inclinometer to determine how steep the slope is. If it’s more than 10%, you might need extra reinforcement.
- Check Drainage: Look at how water flows during rain. Poor drainage can wash away your turf, so plan for solutions like French drains if necessary.
- Choose the Right Turf: Pick a hardy, erosion-resistant variety of turf. Ask your supplier for options suited for sloped areas, especially those with strong root systems.
Step 2: Prepare the Ground
Good preparation sets the stage for success. Here’s how to get started:
- Clear the Area: Remove existing grass, weeds, rocks, and debris. You want a clean slate. Use a garden spade or mechanical turf cutter to strip the area down to bare soil.
- Level the Soil: Rake the soil to create an even surface. Don’t try to flatten the slope; just ensure that there are no dips or bumps.
- Improve Soil Quality: Loosen the soil using a garden fork, especially if it’s compacted. Mix in compost or a good-quality topsoil to improve nutrient levels and water retention.
- Firm the Base: To help prevent the turf from sinking or shifting, walk over the soil or use a roller to firm it up.
Step 3: Lay the Turf
- Start at the Bottom: Begin at the lowest point of the lawn and lay the turf strips horizontally. This ensures stability and prevents the pieces from sliding down.
- Position and Overlap: Place the edges of the turf strips tightly together without gaps. However, make sure that you aren’t overlapping too much, as that can create uneven layers throughout the lawn.
- Secure the Turf: Use biodegradable stakes or pins to hold the turf in place. Place them every 2–3 feet along the edges and in the middle of each strip, especially if the slope is steep.
- Trim as Needed: Use a sharp knife or spade to cut the turf to fit curves or edges. Being precise to avoid leaving exposed soil is essential.
- Stagger the Seams: When laying additional rows, offset the seams of the strips, similar to a brick pattern. Staggering the seams improves stability and reduces erosion risks.
Step 4: Water and Care for the Turf
Proper watering and care during the first few weeks are critical:
Water Immediately: After laying each section, water it thoroughly. Saturate the soil to help the turf bond and root quickly.
Water Regularly: Keep the turf consistently moist, but avoid overwatering, which can cause runoff. A soaker hose or sprinkler with low pressure works best for slopes.
Protect Against Runoff: Water gently to prevent the turf from shifting. Consider watering in short intervals instead of all at once.Monitor Rooting: After 2–3 weeks, check if the turf has rooted by gently tugging on a corner. If it resists, the roots are establishing well.
Step 5: Maintain Your Sloped Lawn
Once your turf is in place, regular maintenance keeps it healthy and secure:
Mow Your Lawn Carefully:
It usually takes between 2-3 weeks for the turf to become rooted firmly; only mow after this time. When mowing, use a lightweight mower and mow across the slope, not up and down. Mowing this way will reduce stress on the turf and mower.
Fertilize:
Apply a balanced fertilizer about six weeks after laying the turf. Repeat every 6–8 weeks during the growing season.
Inspect for Erosion:
Check regularly for bare spots or areas where the turf might be shifting. Re-secure any loose pieces immediately.
Repair Damage Quickly:
Fill in any bare patches with seed or replacement turf to prevent weeds and erosion from taking hold.
Troubleshooting Common Issues
- Turf Sliding: Re-anchor the turf with additional stakes or pins and water lightly to help the roots re-establish.
- Uneven Growth: Adjust watering to ensure consistent moisture across the slope.
- Bald Spots: Patch these areas quickly with fresh turf or seed.
Ready to Turf Your Slope?
By assessing your site, preparing the ground, and following a methodical process, you can create a stunning lawn that stays in place. Once your lawn has been put in place, keep up on regular maintenance to ensure the results last for years.
For expert advice, top-quality turf, and professional turf-laying services, contact Lavington Turf Farms today.
How to Create a Pet-Friendly Lawn

As pet owners, we want our pets to have the best of everything, like playtime, comfort, and a backyard they can enjoy. However, keeping your lawn beautiful and safe for your pets can be challenging. A pet-friendly lawn needs to be durable, easy to maintain, and safe for your pets to roam and relax. If you’re looking to create a yard where both you and your pets can enjoy, you’re in the right place. Here’s how to create a pet-friendly lawn.
Lawn Care Essentials for a Pet-Friendly Yard
Before getting into landscaping or picking out grass, it’s important to know the basics of lawn care. Healthy lawns make for happier pets. One of the most crucial elements is choosing pet-safe products. Always choose non-toxic, organic lawn fertilizers and pesticides. This way, your pets will not come into contact with harmful chemicals.
Regular lawn maintenance is key to keeping your lawn in top shape. Watering deeply and mowing consistently will help your grass grow thick and resilient, which is important for handling the wear and tear from your pets.
Aerating the lawn a few times a year is also helpful. It helps improve drainage and reduces puddles, so your pets don’t have to deal with a muddy mess after a rainstorm.
A healthy, well-maintained lawn will be easier and safer for your pets. Try using local lawn care services to ensure optimal lawn care.
Best Types of Lawns for Pets
Choosing the right type of grass for your yard is a game-changer when creating a pet-friendly lawn. Some grasses are more durable and resistant to the wear and tear that pets often cause. For a lawn that can withstand lots of playtime and running around, go for varieties like Bermuda grass, Kentucky Bluegrass, or Fescue. These grasses are hardy, tolerate heavy foot traffic, and are relatively easy to maintain. They also tend to handle pet urine better, which is a huge plus for pet owners.
Avoid grasses like foxtail or certain varieties of Bermuda that can irritate your pet’s paws. Foxtail, for instance, has sharp seed heads that can get lodged in your dog’s fur or even cause infections. When planting, you’ll want to steer clear of these to keep your dog safe.
Managing Lawn Damage
Active pets, especially dogs, can put your lawn to the test with all their running, digging, and playing. Over time, high-traffic areas may become worn down, and certain spots could end up with bald patches.
To help maintain a healthy lawn despite your pet’s playful antics, try to rotate areas where your pets spend the most time. Changing up the paths they use can prevent heavy wear on any one spot. If one spot is damaged, reseeding damaged areas or using grass patches can help restore the lawn’s appearance.
If digging is a problem, consider creating a designated digging zone where your pet can safely satisfy their instincts without damaging the rest of the yard.
For larger, high-traffic areas, think about using durable ground covers like artificial turf or gravel to provide a low-maintenance solution. With a little attention and effort, you can maintain a beautiful lawn while still giving your pet the freedom to run and play.
Landscaping Ideas for a Dog-Friendly Yard
Landscaping your yard to suit your pets’ needs is just as important as picking the right grass. For example, if your dog loves to run around, you might want to add gravel paths or mulch areas. These features add texture and colour to your yard. They also help prevent your pets from tearing up your grass with too much running or digging.
Another idea to consider is creating an area that is off-limits to pets by adding decorative fencing or bushes to separate spaces. This way, you can still enjoy a well-kept lawn while allowing your pet to have their own designated spot to play.
When adding plants to your yard, it’s important to make sure that they are safe for your pets. Be aware of toxic plants. Some plants, such as lilies, are toxic to animals. However, many safe plant options like lavender, marigolds, or sunflowers exist. By using these plants, your pets are safe, and you add some colour to your yard.
Using Mulch for Pet-Friendly Landscaping
Mulch is an excellent addition to your pet-friendly lawn design. Not only does it help retain moisture and control weeds, but it also offers a soft surface for pets to walk and rest on. However, some types of mulch, like cocoa mulch, can be harmful to dogs if ingested, so always choose pet-safe varieties such as cedar, pine, or straw. Well-mulched areas around garden beds or pathways will enhance your landscaping and provide a safe, comfortable spot for pets.
Additional Pet-Friendly Lawn Care Tips
Now that you’ve got the basics down, here are some pet-friendly lawn care tips that will help you keep your yard in good condition:
- Provide shaded areas: Make sure there are cool spots for your pets to relax during the summer.
- Train your pets: Teach your pets to stay out of specific areas to protect your grass and plants.
- Pick up pet waste regularly: Keeping the lawn free from waste will help maintain its health and cleanliness.
- Water your lawn: Water deeply but less frequently to keep your lawn healthy and dog-friendly.
- Trim grass regularly: Keeping the grass short will prevent it from getting too tough for your pet’s paws.
- Rake up pet waste: Clean up after your pets regularly to prevent waste buildup, which can damage the grass.
- Control urine damage: Rinse the area with water after your dog urines to prevent yellow patches and burns on the grass.
A Pet-Friendly Lawn Awaits
Creating a pet-friendly lawn is all about finding the right balance between durability, beauty, and safety. With the right grass, careful lawn care, and thoughtful landscaping, you can create a yard that both you and your pets will love. By following these tips, you’ll not only have a well-maintained lawn but also a safe space for your pets to enjoy.
Contact us at Lavington Turf Farms for expert advice and high-quality products to help you achieve your pet-friendly lawn.
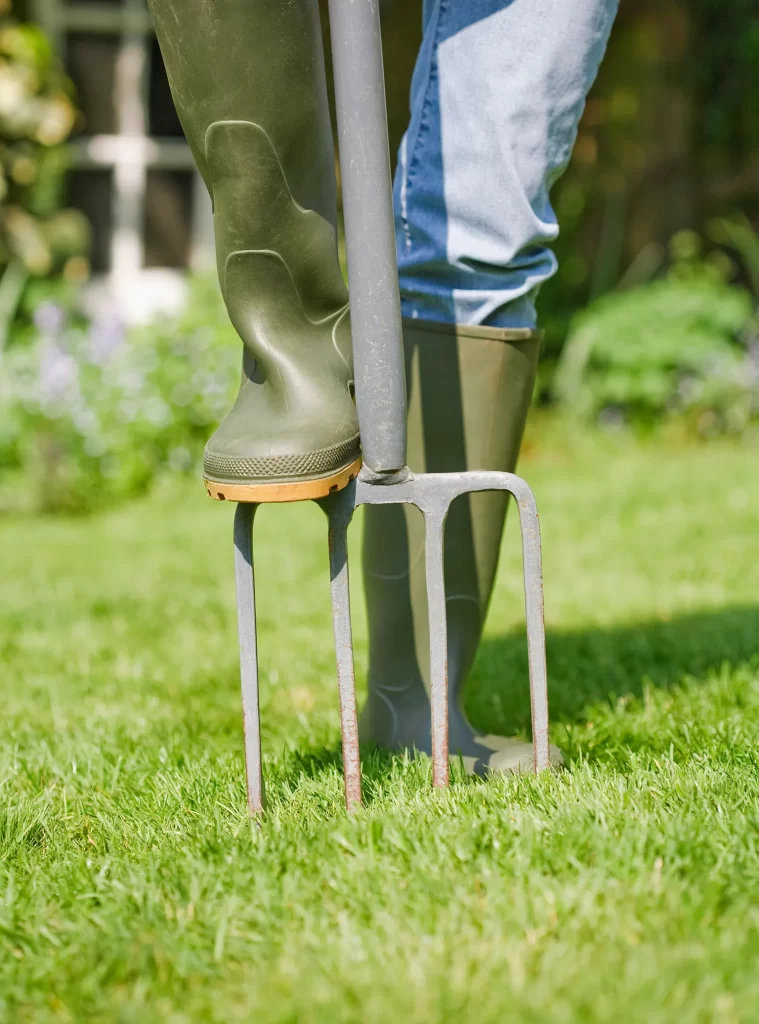
Benefits of Using a Lawn Aerator: How to Keep Your Turf Healthy
Keeping a lush, green lawn involves more than just regular mowing and watering. For a truly healthy lawn, one crucial yet often overlooked practice is aeration. Aeration is a technique that can transform your lawn by improving its overall health and appearance. In this blog, we’ll explore the benefits of aerating your lawn and how it can help you achieve a thriving, beautiful turf.
What is Lawn Aeration?
Lawn aeration involves perforating the soil with holes to enable air, water, and nutrients to reach the lawn surface and reach the grassroots. This practice helps alleviate soil compaction and thatch build-up, which are common problems in many lawns. Aeration can be performed using various tools, such as manual aerators, electric aerators, and gas-powered aerators. Each type has its advantages, but all serve the same essential purpose: to enhance the health of your lawn.
Benefits of Aerating Your Lawn
Improves Soil Structure
Soil compaction is a major issue that can hinder lawn growth. Compacted soil restricts the flow of air, water, and nutrients, resulting in poor root development. Aeration helps break up compacted soil, allowing grass roots to penetrate deeper and grow more vigorously. This improved soil structure supports healthier grass and enhances the overall resilience of your lawn.
Increases Nutrient Availability
One of the primary benefits of aeration is the enhanced availability of air, water, and nutrients. When you aerate your lawn, you create pathways for fertilizers and organic matter to reach the root zone. This increased access ensures that the grassroots receive the critical nutrients they need to thrive. As a result, your lawn will be better equipped to recover from stress and maintain its lush appearance.
Enhances Water Absorption
Aeration plays a critical role in improving water absorption. Compacted soil often causes water to run off rather than penetrate deeply into the ground. By creating holes in the soil, aeration
enables water to seep into the root zone more effectively, reducing runoff and promoting consistent moisture levels. This improved water absorption helps your lawn withstand dry periods and maintains its health throughout various weather conditions.
Promotes Thicker Grass Growth
A well-aerated lawn is more likely to experience thicker grass growth. By reducing soil compaction and thatch build-up, aeration encourages the development of new grass shoots. This results in a denser lawn that fills in bare spots and creates a lush, even turf. Thicker grass not only looks better but also helps suppress weeds and improves the overall durability of your lawn.
Reduces Lawn Thatch
Thatch is a layer of dead grass, roots, and organic matter that can build up on the lawn surface. While a small amount of thatch can be beneficial, excessive thatch can prevent air, water, and nutrients from reaching the grassroots. Aeration helps break down this thatch layer by physically removing small plugs of soil, which allows the thatch to decompose more efficiently. This reduction in thatch contributes to a healthier lawn and better grass growth.
When and How to Aerate Your Lawn
The timing of lawn aeration is essential for achieving optimal results. The best times to aerate your lawn are during the growing seasons—typically spring or fall—when the grass is in active growth and can recover swiftly.
To aerate your lawn, follow these steps:
- Choose the Right Aerator: Select an aerator that suits the size of your lawn and the level of compaction. For smaller lawns, a manual aerator may suffice, while larger areas might benefit from an electric or gas-powered aerator.
- Prepare the Lawn: Before aeration, ensure the soil is moist but not overly wet. Water the lawn a day or two before aerating to make the soil easier to penetrate. Mow the grass to a shorter length, which allows the aerator to reach the soil more effectively.
- Aerate the Lawn: Operate the aerator according to the manufacturer’s instructions. Move slowly and cover the entire lawn surface, making sure to overlap your passes to ensure even coverage. The goal is to create holes that are spaced about 2-4 inches apart.
- Post-Aeration Care: After aeration, leave the soil plugs on the lawn surface. They will break down over time and contribute organic matter back into the soil. Water the lawn thoroughly to help the grass recover and promote new growth. Consider applying a balanced fertilizer to further support the revitalization of your turf.
Tips for Maintaining a Healthy Lawn Post-Aeration
To keep your lawn in top condition after aeration, follow these additional tips:
- Watering: Continue to water your lawn regularly to support new grass growth and maintain adequate moisture levels.
- Fertilizing: Use a balanced fertilizer to provide essential nutrients and enhance recovery.
- Mowing: Avoid mowing immediately after aeration. Allow the grass to grow and recover fully before resuming regular mowing.
Incorporating aeration into your lawn care routine can greatly enhance both the health and appearance of your turf. The benefits of using a lawn aerator—such as improved soil structure, increased nutrient availability, better water absorption, thicker grass growth, and reduced thatch—will help you achieve a vibrant, lush lawn that enhances your outdoor space.
Ensure a Well-Maintained Lawn
Aerating your lawn is a straightforward yet effective way to keep your turf healthy and thriving. With the right tools and techniques, you can ensure that your grassroots receive the air, water, and nutrients they need to flourish. Consider adding lawn aeration to your lawn care routine and enjoy a well-maintained lawn.
If you need more information or professional assistance, don’t hesitate to reach out for expert lawn care.